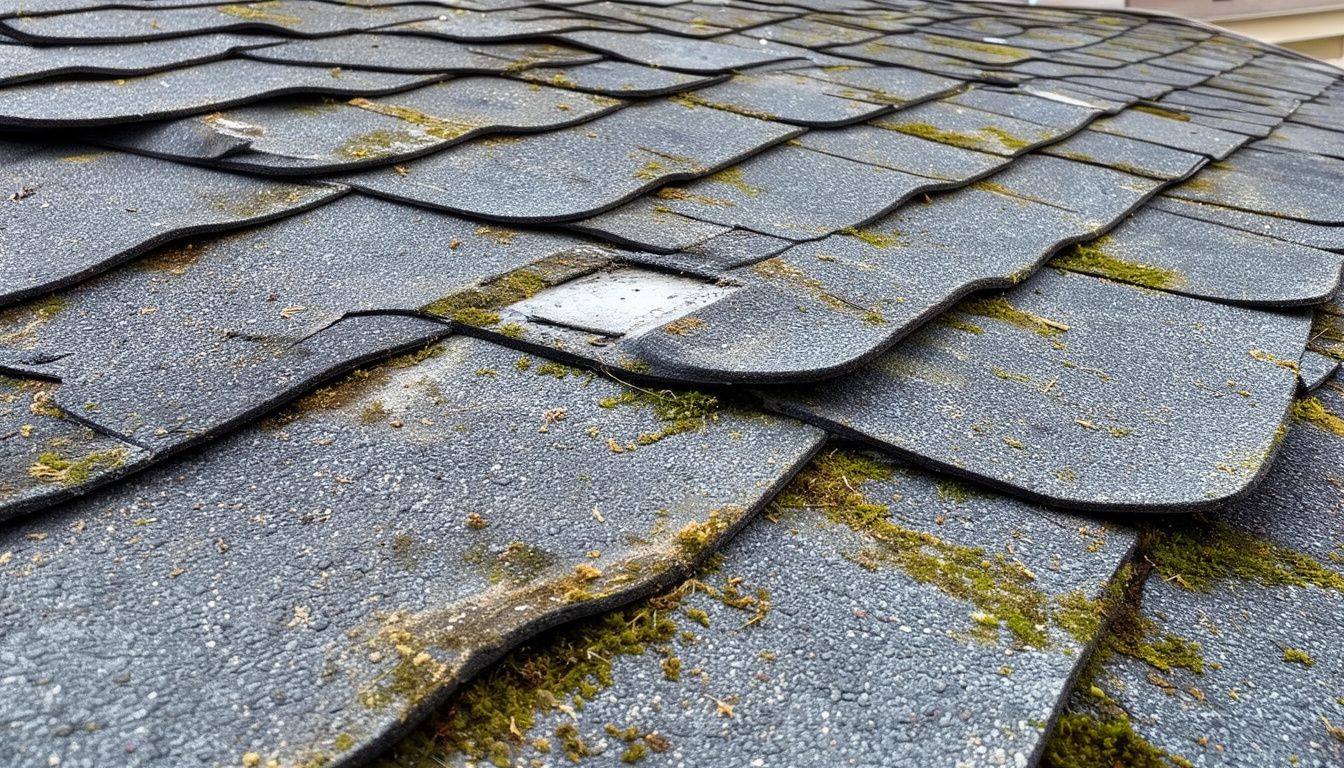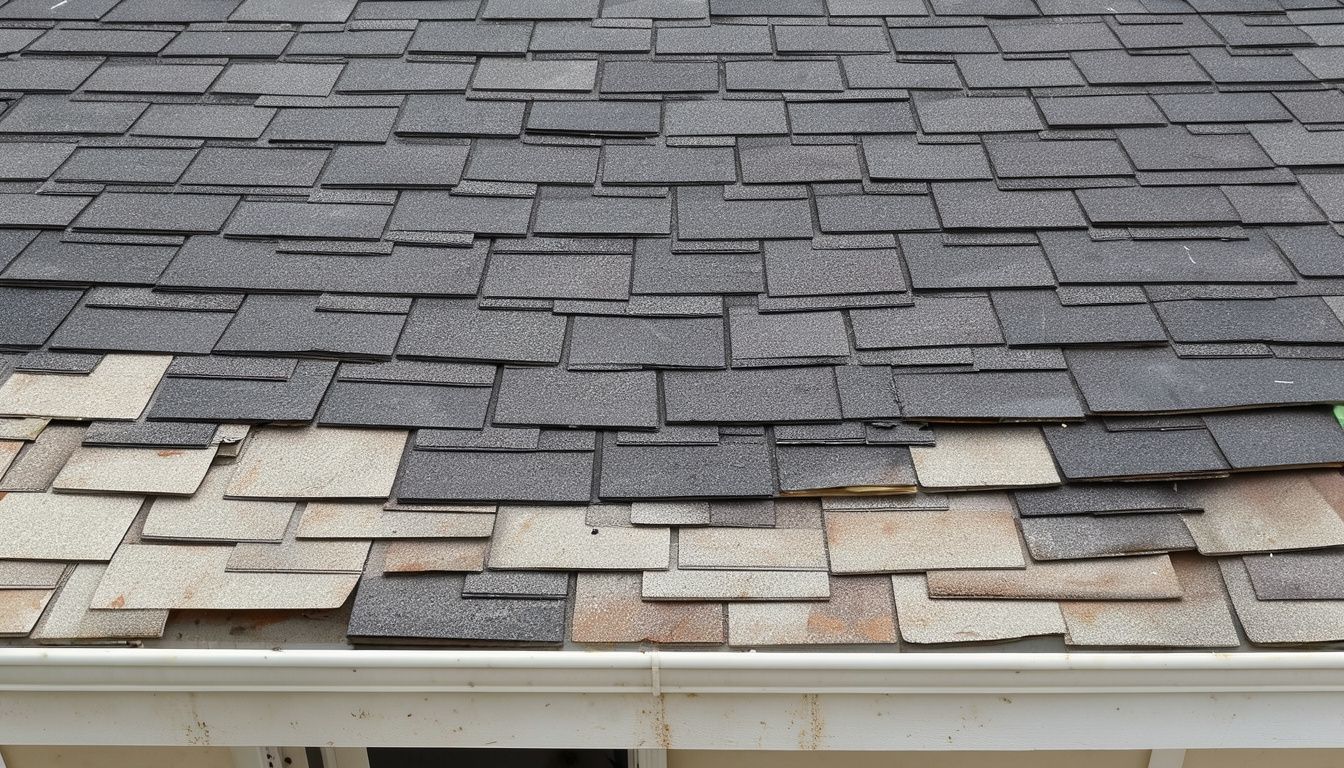
A roof boot is the flashing that seals a plumbing vent pipe where it passes through your roof. When its rubber collar cracks, rain runs down the pipe and into the attic. HomeGuide puts a cracked pipe boot replacement at $250 to $600 on average, and many failed boots can be fixed without a new roof. Here is how to tell what you have, what fails, and what the repair involves.
What a Roof Boot Is and What It Does
A roof boot, also called a pipe boot, vent boot, pipe jack or plumbing vent flashing, is the small cone or dome you see wrapped around each pipe that pokes through the shingles. Its one job is to close the hole the pipe needs without blocking the pipe itself.
The pipe matters. This Old House explains that rooftop vent pipes allow sewer gases to escape your household and keep pipes draining efficiently. The boot seals the gap around the outside of the pipe.
The Journal of Light Construction (JLC) describes the standard detail plainly: vent pipes on wood and asphalt roofs are usually flashed using a pre-made metal pan with a rubber boot. The pan lies flat on the roof, and the rubber collar hugs the pipe.
The parts of a typical pipe boot
- Base flange or pan: the flat plate, usually aluminum, galvanized steel or plastic, that lies on the roof deck and gets woven into the shingle courses.
- Collar or gasket: the flexible ring, usually neoprene or another rubber, that grips the pipe. This is the part that fails most often.
- Riser (on some designs): a sleeve around the pipe. On a traditional lead flashing it encloses the vent pipe and folds into the pipe at the top; on two-piece covers a cap wraps over the top of the pipe to shed water without relying on a rubber gasket.
Roof boot, pipe jack, vent flashing: same thing?
Mostly, yes. Roofers, inspectors and store shelves use the names interchangeably. A "lead boot" is the traditional version, a soldered lead riser pipe that encloses the vent pipe. A "rain collar" or "storm collar" is a separate add-on ring that slides over an existing boot, often as a repair.
Don't confuse a pipe boot with the flashing around a furnace or water heater flue. HomeGuide prices metal gas vent collar repairs as a separate job, because those collars fail in their own ways.
Where You Find Roof Boots and How They Shed Water
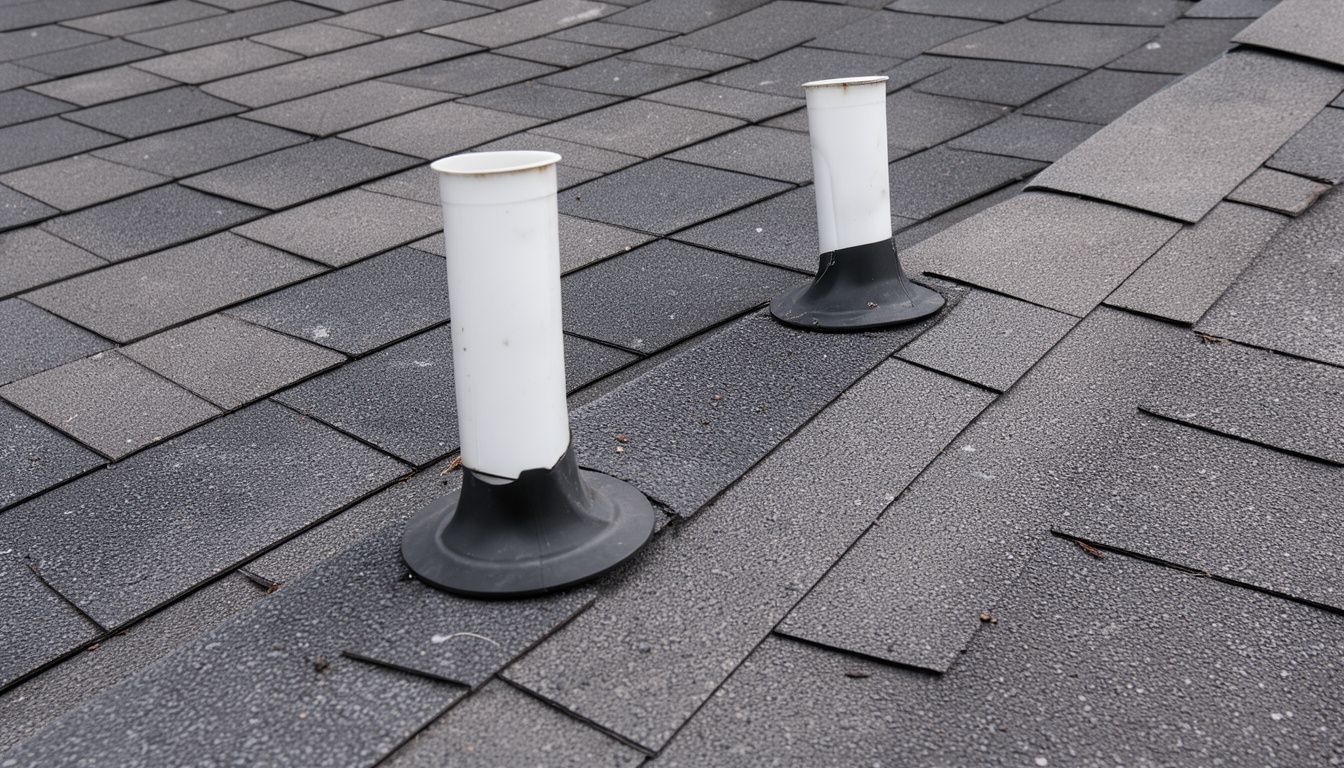
Most homes have one or more plumbing vents, usually above bathrooms, the kitchen or the laundry area. You may also see boots around radon pipes, high-efficiency furnace intake and exhaust pipes, or electrical service masts.
A pipe boot relies on the same layering as the shingles around it. Oatey's installation guide notes that each shingle row should overlap the previous one so water cannot penetrate below or between the shingles. JLC says to install the boot "interwoven with the roof shingles," which means the top and sides of the pan slide under the shingles above, while the bottom edge lies on top of the shingles below.
That layering lets water that hits the shingles above the pipe run over the pan, around the bell and back onto the shingles downslope. The collar handles only the water that runs straight down the pipe or splashes against it.
Fine Homebuilding contributor Mike Guertin adds a detail that explains many leaks: most boots have a thin rubber collar that seals to the vent pipe, and there's often no additional seal beneath the collar. When the collar splits, nothing else stops the water.
How high the pipe should stand
The pipe height affects how well a boot can work. The International Residential Code, as adopted in Texas and shown on UpCodes, says open vent pipes through a roof shall terminate not less than 6 inches above the roof or 6 inches above the anticipated snow accumulation, whichever is greater.
Local rules can ask for more. Minnesota home inspector Reuben Saltzman writes that plumbing vents should ideally stick up out of the roof about one foot, which is what Minnesota requires. A pipe that is too short leaves no room for a boot collar or a retrofit cover to grip.
Types of Roof Boots by Material
Pipe boots come in a handful of material families. The least expensive and most common is a metal or plastic pan with a rubber collar. Better options use silicone, sheet lead, all-metal designs or two-piece covers that keep rubber out of the sun.
Fine Homebuilding priced the gap clearly: commodity rubber boot flashings cost $5 to $10, while better boot flashings cost between $11 and $60. On a roof that may last decades, the boot is a small share of the job.
Rubber and neoprene collar boots
This is the standard boot at most building suppliers. JLC describes it as a neoprene boot paired with a metal, often aluminum, base plate. It is easy to install and fits common pipe sizes.
The weakness is the collar. HomeGuide says rubber boots tend to deteriorate faster in hot, sunny climates, while metal or high-quality neoprene boots last longer. In Minnesota, Saltzman reports that rubber boots seem to last about 10 to 15 years.
Thermoplastic (TPE and TPO) boots
Some boots skip the metal pan and are molded entirely from plastic. Oatey says its standard flashings are made from aluminum, thermoplastic or galvanized materials, with self-sealing collars that fit over pipes without caulking.
Bullet Boot, which Fine Homebuilding reviewed, is made from flexible UV-protected TPE plastic and is sized by pipe diameter from 1-1/2 in. to 4 in. Perma-Boot, a two-piece design, is made from high-impact TPO plastic.
EPDM boots for metal roofs
Metal roofs use a different style of boot: a flexible rubber cone with a soft base that you trim to the pipe size and fasten to the metal panels. Oatey's Master Flash line is tailored for metal roofs, customizable for multiple pipe diameters, and carries a 20-year warranty, according to the company.
EPDM is the synthetic rubber also used on many low-slope roofs. Guertin uses uncured EPDM flashing tape as a backup seal around vent pipes, describing it as durable and rated for UV exposure. No manufacturer page we could verify publishes a lifespan for EPDM pipe boots, so the warranty is the most useful number you will get.
Silicone boots
Silicone is the premium rubber option. Lifetime Tool's Ultimate Pipe Flashing uses a thick silicone boot instead of a thin collar, and JLC reports it is made with ultra-pure silicone for UV and ozone stability and isn't prone to cracking.
The product line also uses a compression collar to keep the seal pressed against the pipe. Lifetime Tool's catalog listing says the flashing is water-tight for the life of your roof, subject to the warranty's terms. JLC lists pitches from flat to 20/12 for pipes up to 2 inches, and up to 18/12 for 3- or 4-inch pipes.
Lead boots
Lead is the traditional choice. Fine Homebuilding describes the classic lead flashing as a soldered lead riser pipe that encloses the vent pipe and folds into the pipe at the top, soldered to a flange that layers into the shingles. These cost between $25 and $50.
Lead is soft and easy to shape. HomeGuide calls lead flashing extremely malleable and long-lasting, and JLC notes that on slate and tile roofs a malleable lead jacket might last longer than an average aluminum and rubber boot.
The drawbacks are real. Lead boots need to be fabricated or ordered to match a specific roof pitch and pipe diameter. Squirrels chew them, and Lifetime Tool, which sells a competing product, argues that lead flashings are hazardous and do not handle mechanical stress from thermal movement well.
All-metal and two-piece boots
Some newer designs remove the rubber collar entirely. The Quarrix pipe boot is made from galvanized or coated steel in two pieces, a base boot and a top collar pipe, and comes in two pitch ranges, 3/12 to 8/12 and 8/12 to 14/12, for pipe diameters from 1-1/2 in. to 4 in.
Quarrix says its boot contains no lead and has a protective coating and carries a "for the life of the roof" warranty. Two-piece plastic covers like Perma-Boot work the same way: a cap sleeve encloses the pipe so water sheds off the top without relying on a rubber gasket.
Roof Boot Types Compared
The table below sums up what the sources say about each type. Lifespans vary widely with sun, climate and installation, so where no source gives a figure, the table says so rather than guessing.
| Boot type | Lifespan or warranty, as stated by sources | Pros | Cons |
|---|---|---|---|
| Rubber or neoprene collar on metal or plastic pan | HomeGuide: roof vent boots last 10 to 20 years on average. A Minnesota inspector: about 10 to 15 years. Fine Homebuilding: some gaskets leak in as little as seven years. | Cheap ($5 to $10 per Fine Homebuilding), stocked everywhere, simple to install | Collar dries out and splits in the sun; often outlived by the shingles |
| EPDM (mostly metal-roof boots) | No published lifespan found. Oatey's Master Flash metal-roof line carries a 20-year warranty. | Flexible, trims to many pipe sizes, made for metal panels | Must be fastened and sealed correctly to ribbed panels |
| Silicone (for example, Ultimate Pipe Flashing) | Manufacturer says water-tight for the life of your roof, per its warranty. | UV and ozone stable per JLC, thick boot, compression collar | Higher price ($55 to $57 per Fine Homebuilding); size-specific |
| Lead | HomeGuide: extremely malleable and long-lasting. JLC: may outlast a rubber boot on slate and tile. | Shapes tightly to pipe, no rubber to crack | Made to fit a pitch and pipe size; squirrels chew it; lead hazard |
| Thermoplastic (TPE, TPO) | No independent lifespan figure found. | UV-protected plastic, one-piece or two-piece designs | Availability varies; fit depends on pipe height |
| All-metal or two-piece cover (Quarrix, Perma-Boot) | Quarrix: "for the life of the roof" warranty. | No exposed rubber gasket; some retrofit over old boots | Harder to find locally; pipe may need trimming |
Why Roof Boots Fail
A pipe boot sits in full sun, takes every rain that runs down the slope, and moves a little each day as the pipe and roof heat and cool. Most failures trace back to a short list of causes.
Guertin, who investigates roof leaks, writes that of all the leak calls he received in recent years, the main culprit was plumbing vent flashing boots.
UV damage and dried-out rubber
Sunlight is the main enemy of rubber collars. Fine Homebuilding shows a plumbing vent flashing completely deteriorated from UV damage, and This Old House lists extended exposure to UV rays among the common causes of vent pipe leaks.
Oatey makes the same point from the manufacturer's side: a flashing must withstand constant exposure to UV rays without becoming brittle. Once the collar loses its stretch, it shrinks away from the pipe and splits, often on the upslope side where water hits it first.
Movement and temperature swings
Pipes expand and contract with the seasons, and roofs move too. This Old House names temperature fluctuations that cause the pipes to split or crack as one cause of leaks. Oatey says the flashing must handle the roof's expansion and contraction through various temperatures to keep its seal.
Nails in the wrong place
Nails are a quiet cause of boot leaks. A pipe flange should be fastened only where shingles cover the nail heads. Oatey's own instructions say to secure the flashing using roofing nails concealed under the next few rows of shingles.
InspectAPedia points out a common shortcut: exposed face nails at the bottom of the boot flashing, which puncture the metal and form possible leak points. Typical installation guides warn installers not to face-nail plumbing vent flashing at all.
Nail pops in the surrounding shingles can mimic a boot leak too. HomeGuide notes that nail pops may indicate more serious roofing problems and that the roofer should inspect the whole roof system.
Poor installation and wrong sizing
Some boots leak from day one. Oatey warns never to slide a smaller flashing collar over a larger pipe, because it will cause fatigue and failure in the collar, and never to install a larger collar over a smaller pipe using sealant to fill the void.
A sharp pipe edge is another trap. This Old House contractor Tom Silva notes that if a roofer pushes the rubber boot onto a pipe with a sharp edge, it can slice or weaken the seal from the start.
Shingle detailing matters as much as the boot itself. Guertin writes that in some cases the collar is fine, but the leak comes from how the shingles were detailed around the flashing pan. He also warns that roof cement used to seal shingles to the pan may dry and crack before it's time to reshingle.
Animals, branches and storm debris
Guertin often finds the rubber collar split or damaged by a falling branch or a critter chewing at the rubber. Lead is a special target. Saltzman reports that squirrels like to gnaw on lead vent caps and keep coming back once they start.
Quarrix makes the same observation in its product launch: some cheap pipe flashings and covers include lead, which entices small animals to gnaw at them. Trimming branches back from the roof reduces both chewing and impact damage.
Age mismatch with the shingles
The boot often wears out before the roof does. Manning Building Products, maker of Perma-Boot, writes that shingles are designed for a 25- to 50-year life while the roof still depends on a small pipe boot at each penetration. Guertin makes the same point: roofs last 30 years to 50 years, so you need a boot that's up for the duration.
Signs Your Roof Boot Is Failing
A failing boot rarely announces itself until water shows up indoors. You can catch many problems earlier by checking from the ground, from the attic and during rain.
What to look for from the outside
You don't need to climb on the roof to see most boot problems. Binoculars or a phone camera zoom from the yard usually show enough.
- Cracks or splits in the rubber collar, especially where it meets the pipe
- Visible gaps in the vent boot, another sign HomeGuide lists
- Chewed or torn rubber or lead
- A base flange lifting at the edges, or shingles curling near the vent
- Rust on metal components, one of the signs HomeGuide lists
- Exposed nail heads on the bottom edge of the flange
- Old tar or caulk smeared around the collar, a sign of an earlier patch
What to look for in the attic
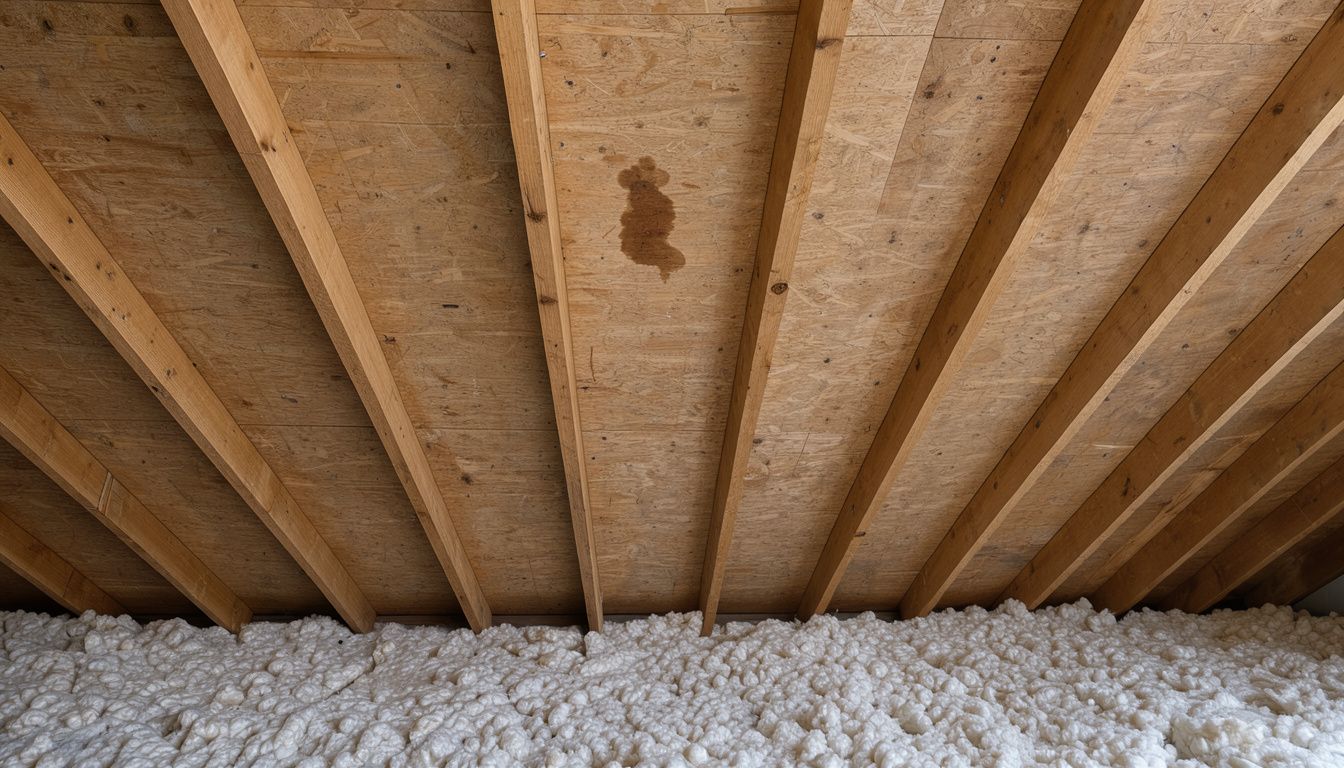
Go up with a flashlight and find where each vent pipe passes through the roof deck. This Old House lists damp or moldy attic insulation, dripping sounds that come from the attic during rainy weather, and musty odors in the upper levels of your home as signs of a leaking vent pipe.
HomeGuide adds musty odors in the attic or upper floors to its list of warning signs.
Be extra careful if your roof deck is insulated with spray foam. Guertin warns that on roofs where the rafters or trusses have been insulated with spray foam applied directly to the roof sheathing, a leak can persist for years before anyone notices.
What shows up inside the house
The most common clue is a ceiling stain near a bathroom or other room below a vent. HomeGuide lists water stains on the ceiling near vent locations as a sign you need roof vent repair.
Water travels along rafters and pipes before it drips, so the stain may not sit directly under the boot. That is one reason a roofer will usually check the attic before deciding the boot is the cause.
Boot leak or something else?
Not every stain near a vent is a boot leak. Shingle damage nearby, nail pops or condensation can all leave similar marks. If the stain appears only on cold days and not during rain, condensation is a likely suspect.
Oatey suggests a simple test after a flashing is installed: douse the roof above the pipe vent for 15 minutes, then check the attic where the pipe exits. The same approach, done with a garden hose and a helper in the attic, can confirm a suspected boot leak.
Temporary Fixes vs. Real Repairs
When water is coming in, you want it stopped now. Some fixes buy time, some are true repairs, and one common fix is mostly wasted effort.
Caulk and roof cement: short-term only
Smearing sealant over a cracked collar is the classic quick fix. Saltzman calls gooping a damaged lead cap with tar ineffective and temporary, and Guertin notes that roof cement may dry and crack before the roof is due for reshingling.
Sealant can still help in an emergency or as part of a proper repair. This Old House's repair method uses lap-seal caulk under and around a new replacement boot, and suggests reapplying caulk around vent pipes every few years. Treat a caulk-only patch as a stopgap until a real repair.
Slip-over rain collars
If the base flange is sound and only the rubber collar has failed, a new collar can slide over the old one. Saltzman notes new collars are sold at home improvement stores for under $10, and no tools are needed.
Oatey makes a rain collar for its no-calk flashings that installs over the existing rain collar to restore its seal. This works only when the pipe top is accessible and the flange underneath is not leaking.
Retrofit covers
Two-piece retrofit covers like Perma-Boot slip over the old boot and enclose the pipe, so you don't have to pull shingles. Fine Homebuilding's Rick Arnold wrote that this reduced labor to about five minutes, and JLC lists it for roof pitches from 3/12 to 12/12.
Retrofits depend on pipe height. Saltzman notes that a vent that is too tall can be cut down and one that is too short has to be made taller before a retrofit cover fits.
Collar swap on an old roof
When shingles are old and brittle, pulling the whole boot can wreck the roof around it. Fine Homebuilding describes a fix where the installer cut the dome and collar out of a new identical flashing, removed the scraps of the old collar, laid a bead of urethane sealant and fastened the new piece over the old pan.
When a Full Replacement Makes More Sense
A full replacement means removing the old boot from under the shingles and weaving a new one in. Choose it when the problem goes beyond the collar.
- The base flange is cracked, rusted through or bent
- Nails were driven through the exposed flange
- The boot is the wrong size for the pipe
- The shingles around the boot were cut or layered wrong
- Water damage reaches the roof deck
- You are reroofing anyway
Replacement on an existing roof is harder than it sounds. Fine Homebuilding notes that a boot is easy to replace while laying new shingles but is a different challenge with old, dry, sealed-down shingles, where removing the flashing can damage most or all of the surrounding shingles.
Arnold adds that replacing a vent boot usually takes an hour or two, and if the shingles are too brittle to save, you'll never get an exact color match with new ones. Ask whether the roofer has matching shingles or plans to blend in salvaged ones.
Always new boots with a new roof
If you're replacing the roof, replace every pipe boot at the same time. Reusing an old boot under new shingles all but ensures a second repair long before the shingles wear out, given how much shorter rubber collars last than modern shingles.
Use the reroof as a chance to upgrade. Fine Homebuilding's Guertin argues that better boot flashings, at $11 to $60, may be well worth the expense on a roof meant to last decades.
How a Roofer Replaces a Pipe Boot, Step by Step
Methods vary by roofer and product, but a sound replacement on an asphalt shingle roof follows the same basic order. Knowing it helps you understand a quote and spot shortcuts.
- Set up safely. The roofer sets a ladder, anchors and, on steeper roofs, roof jacks. HomeGuide notes that roofs with slopes greater than 6:12 may require additional safety equipment and more time.
- Release the shingles above the boot. Using a flat bar, the roofer breaks the seal strips on the courses above and to the sides of the pipe, then pulls the nails that hold the old flange. Oatey's instructions describe prying up the roofing nails securing the old flashing and lifting the shingles above it.
- Remove the old boot. The old flashing slides up and off the pipe. Shingles that crack during removal get replaced.
- Inspect the pipe and deck. The roofer checks the pipe for cracks and the sheathing around the hole for soft or dark wood. Rotted decking gets cut out and replaced before anything else goes back.
- Prepare the pipe. Rough or sharp edges get smoothed so they can't slice the new collar. Oatey's guide recommends giving the end of the pipe a sloped, chamfered edge before sliding the flashing on.
- Add a backup seal (optional but smart). Guertin wraps the pipe with 6-in.-wide strips of uncured EPDM flashing tape with butyl adhesive so the roof stays dry even if the collar fails later.
- Slide on the new boot. The new flashing goes over the pipe and lies flat. The bottom edge of the pan sits on top of the shingle course below, and the top and sides go under the shingles above.
- Fasten in the right places. Nails go only into the upper part and sides of the flange, where the next courses will cover them. No face nails on the exposed bottom edge.
- Reweave the shingles. The roofer trims shingles around the bell of the boot, nails them in place and seals down any loosened tabs. Guertin also tucks an extra piece of underlayment that laps 6 in. beneath the next underlayment joint above and down onto the top of the pan.
- Test. A good roofer runs water over the area above the pipe and checks the attic, as Oatey recommends.
Tips for metal and tile roofs
On metal roofs, the boot is usually a flexible rubber cone, like Oatey's Master Flash, that can be adjusted to several pipe diameters and is fastened to the panels following the maker's instructions. On tile roofs, Homeyou notes the boot is shaped to fit under the tiles and often requires partial tile removal, which helps explain why tile and slate boot jobs cost more.
Roof Boot Sizes and How to Measure Yours
Pipe boots are sized to the pipe, and getting the size right is part of a repair that stays dry. HomeGuide says standard residential vent boots range from 1.5 to 4 inches in diameter.
The common nominal sizes are 1-1/2, 2, 3 and 4 inches. Perma-Boot, for example, comes in 1-1/2", 2", 3" and 4" sizes, according to Saltzman, and Lifetime Tool sells five sizes for PVC pipe from 1-1/2 in. to 4 in.
How to measure
- Measure the outside diameter of the pipe, not the inside. JLC advises ordering the boot to match the outside diameter of the vent pipe.
- Note the pipe material. PVC, ABS, cast iron and copper pipes of the same nominal size can have different outside diameters.
- Note the roof pitch. Many boots cover a pitch range, and steep roofs may need a high-pitch version.
- Measure how far the pipe sticks up above the shingles, since retrofit covers need a certain height.
Some product lines sell multi-size boots, such as the Perma-Boot 3-in-1, which fits 1.5", 2" and 3" pipes. Even so, Oatey warns against forcing a small collar over a big pipe or filling a gap around a small pipe with sealant.
What Roof Boot Repair and Replacement Cost
National cost guides give a fairly consistent picture for a single boot on an asphalt shingle roof. Prices climb with roof pitch, tile or slate, damaged decking and contractor minimums.
| Job | Typical cost range | Source |
|---|---|---|
| Replace a cracked pipe boot | $250 to $600 on average; can reach $1,500+ | HomeGuide |
| Replace roof vent boots | $154 to $401, average $249 | Homeyou |
| Reseal a roof vent boot (caulk or sealant) | $74 to $225 | Homeyou |
| Roof vent pipe flashing repair | $200 to $500 | HomeGuide |
| General roof vent repair | $400 to $800 on average | HomeGuide |
| Metal roof vent boot | $215 to $522 | Homeyou |
| Tile roof vent boot | $322 to $705 | Homeyou |
| Slate roof vent boot | $330 to $720 | Homeyou |
| Roof inspection | $100 to $400 | HomeGuide |
What drives the price
Homeyou says the price depends on boot material, roof pitch, how many shingles must be removed, and whether the roof deck needs repair. HomeGuide adds that most roofing contractors have minimum trip fees of $300 or more, which is why a single boot rarely costs much less than that.
If the leak has rotted the deck, add that work. HomeGuide puts replacing roof decking or sheathing at $2 to $5 per square foot for materials and labor, and notes that vent leak repairs can often exceed $1,000.
DIY material costs
The parts are cheap. This Old House estimates a do-it-yourself vent pipe repair at about $10 to $20 and 20 to 30 minutes. Commodity boots run $5 to $10, retrofit covers such as Perma-Boot $16 to $20, and premium silicone flashings $55 to $57, according to Fine Homebuilding.
If you have several boots to replace, ask for one quote covering all of them, since the trip fee and setup are shared. To see how a boot repair compares with larger roof work, try our roof replacement cost calculator.
When a Boot Problem Points to a Bigger Roof Issue
A cracked boot is usually a small, local fix. Sometimes, though, it is the first visible symptom of a roof that needs more than a new collar.
Soft or rotted decking
Long-running leaks rot the sheathing around the pipe. If the roofer finds soft wood or the area flexes underfoot, the repair grows to include deck replacement. HomeGuide warns that neglected or undiscovered leaks often lead to wood rot and extensive water damage.
Several boots failing at once
If every boot on the roof is cracked, they are probably the same age, and the shingles may be close behind. This Old House lists multiple vent pipes leaking at once among the situations that call for a professional.
Brittle shingles around the boot
If shingles crack when the roofer lifts them, every repair will leave damage behind. At that point, compare the cost of repeated patches with a partial or full reroof, especially if the shingles are near the end of their rated life.
Leaks that continue after a new boot
If water still comes in after a boot replacement, the source may be somewhere else: nail pops, a damaged shingle upslope or flashing at another penetration. HomeGuide says the roofer should inspect the entire roof system when nail pops appear, since they may indicate more serious problems.
Maintenance That Helps Boots Last
Pipe boots don't need much care, but a little attention catches cracks before they leak.
- Look twice a year. This Old House recommends inspecting your roof and vent pipes at least twice a year, ideally in spring and fall.
- Check after storms. High winds, hail and falling branches can tear collars.
- Keep debris clear. Leaves, twigs and moss trap moisture against the roof and pipe.
- Trim branches. Fewer branches means less impact damage and fewer animals on the roof.
- Peek in the attic. After a heavy rain, look at the sheathing around each vent pipe.
- Know the age. If your roof is more than about ten years old and still has its original rubber boots, budget for replacing them.
DIY or Hire a Roofer?
A slip-over collar or a retrofit cover on a low-pitch, single-story roof is within reach of a careful homeowner. A full boot replacement that requires lifting sealed shingles is better left to a roofer.
Safety is the main reason. This Old House contractor Tom Silva points out that a third of construction fatalities happen from people falling off roofs, and he insists on a harness or staging for anyone on a roof.
Call a licensed roofer when the roof is steep or high, the shingles are brittle, there is any sign of deck damage, several boots are leaking, or you can't tell where the water is coming from.
Questions to ask before you hire
- Are you licensed and insured?
- Will you replace the whole boot or just add a collar or cover, and why?
- What boot material and brand will you use, and what warranty does it carry?
- Will you inspect the decking under the boot, and what do you charge if it needs repair?
- Do you have shingles that match mine?
- Is there a minimum trip fee, and does the price change if you replace several boots?
- What workmanship warranty do you offer on the repair?
How to read a boot repair quote
A clear quote names the boot type and size, says whether shingles will be lifted or replaced, and lists a separate price for any deck repair. Be cautious with a quote that just says "seal vent," since that often means a caulk patch rather than a new boot.
Also check the warranty language. Oatey, for example, says most of its flashings carry a one-year warranty from the date of manufacture, while its Master Flash line carries 20 years. A roofer's own workmanship warranty covers the installation, which is where many boot leaks start.
Common Mistakes Homeowners Make
The biggest mistake is waiting for a ceiling stain. By the time water reaches the drywall, it has often soaked insulation and stained the deck.
The second is relying on caulk. A tube of sealant over a split collar may stop the drip for a while, but it doesn't fix a dried-out collar or a bad flange.
The third is reroofing without new boots. Old rubber collars under new shingles leave a weak point that will fail long before the rest of the roof. Ask for new boots, in a material matched to the roof's expected life, on every reroof quote.
For more on how roofingplanner.com gathers cost data, see how we calculate costs.
Frequently asked questions
How long does a roof boot last?
HomeGuide says roof vent boots last 10 to 20 years on average, depending on material quality, climate and sun exposure. A Minnesota home inspector reports rubber boots lasting about 10 to 15 years, and Fine Homebuilding has seen some gaskets leak in as little as seven years. Silicone, lead and all-metal designs are sold with much longer warranties.
How much does it cost to replace a roof boot?
HomeGuide puts replacing a cracked pipe boot at $250 to $600 on average, with prices reaching $1,500+ depending on boot material and roof pitch. Homeyou lists $154 to $401 for replacing roof vent boots, with an average of $249. Contractor minimum trip fees of $300 or more, per HomeGuide, explain why one boot rarely costs much less.
Can I just caulk a cracked pipe boot?
Caulk can slow a leak for a while, but it is a stopgap. A Minnesota inspector calls tar patches ineffective and temporary, and Fine Homebuilding notes roof cement may dry and crack. A slip-over collar, a retrofit cover or a new boot is the real fix.
What size roof boot do I need?
HomeGuide says standard residential vent boots range from 1.5 to 4 inches in diameter. Measure the outside diameter of the pipe, as the Journal of Light Construction advises, and note your roof pitch. Oatey warns never to force a smaller collar over a larger pipe or fill a gap around a small pipe with sealant.
Should pipe boots be replaced with a new roof?
Yes. Rubber collars usually wear out long before modern shingles, which Manning Building Products says are designed for a 25- to 50-year life. Installing new boots during a reroof avoids tearing into new shingles a few years later, and it is a good time to upgrade to a longer-lasting boot.
What is the difference between a pipe boot and a rain collar?
The pipe boot is the full flashing: a flat base woven into the shingles plus a collar that grips the pipe. A rain collar is a separate rubber ring that slides down over an existing boot. Oatey sells one that installs over the existing collar to restore its seal when the base is still sound.
Can I replace a roof boot myself?
A slip-over collar or retrofit cover on a low, gentle roof is a manageable project, and This Old House estimates a simple vent pipe repair at about $10 to $20 in materials. A full replacement means lifting sealed shingles without cracking them, which is harder. Roof falls are a serious risk, so use a harness or hire a roofer for steep or high roofs.
Sources
- HomeGuide, homeguide.com/costs/roof-leak-repair-cost (read November 22, 2026)
- HomeGuide, homeguide.com/costs/roof-vent-repair-cost (read November 22, 2026)
- HomeGuide, homeguide.com/costs/roof-flashing-repair-cost (read November 22, 2026)
- Homeyou, homeyou.com/roof-vent-replacement-cost (read November 22, 2026)
- Fine Homebuilding, finehomebuilding.com/?p=199713 (read November 22, 2026)
- Fine Homebuilding, finehomebuilding.com/project-guides/roofing/vent-flashing-done-right (read November 22, 2026)
- Fine Homebuilding, finehomebuilding.com/2010/10/09/how-to-repair-a-roof-flashing-boot-in-a-flash (read November 22, 2026)
- Fine Homebuilding, finehomebuilding.com/2012/01/16/perma-boot-312 (read November 22, 2026)
- Structure Tech Home Inspections (homesmsp.com), homesmsp.com/2023/07/a-common-cause-of-roof-leaks-failed-plumbing-vent-flashings.html (read November 22, 2026)
- Structure Tech Home Inspections (homesmsp.com), homesmsp.com/2015/09/an-easy-fix-for-split-boots-at-plumbing-vent-flashings.html (read November 22, 2026)
- Structure Tech Home Inspections (homesmsp.com), homesmsp.com/2023/06/chewed-up-plumbing-vent-flashing.html (read November 22, 2026)
- Journal of Light Construction, jlconline.com/how-to/roofing/flashing-plumbing-vents_o (read November 22, 2026)
- Journal of Light Construction, jlconline.com/products-tools/plumbing-electrical/durable-flashing-for-roof-penetrations_o/ (read November 22, 2026)
- Journal of Light Construction, jlconline.com/products-tools/vent-pipe-boot-repair_o (read November 22, 2026)
- Lifetime Tool & Building Products (Sweets), sweets.construction.com/Manufacturer/Lifetime-Tool---Building-Products-LLC-NST154512/Products/Ultimate-Pipe-Flashing--for-Shingle-Roofs-Kynar--Coated-NST788820-P (read November 22, 2026)
- Roofing Contractor (Lifetime Tool release), roofingcontractor.com/articles/91941-l-true-marine-grade-stainless-steel-ultimate-pipe-flashing (read November 22, 2026)
- Roofing Contractor (Quarrix release), roofingcontractor.com/articles/92339-pipe-boot (read November 22, 2026)
- Roofing Contractor (Manning release), roofingcontractor.com/articles/93235-manning-building-products-releases-new-perma-boot-3-in-1-solution (read November 22, 2026)
- Oatey, oatey.com/faqs-blog-videos-case-studies/blog/how-properly-install-roof-flashing (read November 22, 2026)
- This Old House, thisoldhouse.com/roofing/how-to-fix-a-leaking-rooftop-vent-pipe (read November 22, 2026)
- InspectAPedia, inspectapedia.com/roof/Plumbing-vent-flashing-installation.php (read November 22, 2026)
- UpCodes (IRC P3103.1.1), up.codes/s/roof-extension (read November 22, 2026)