TPO roofing installation follows a fixed order: inspect the deck and tear off anything wet, lay insulation and cover board, attach the membrane, hot-air weld and probe every seam, flash walls, curbs, drains and penetrations, then fit edge metal and pass the manufacturer's inspection. HomeGuide puts the installed price at $4 to $10 per square foot. Seams and flashings decide how long the roof lasts.
What a TPO Roof Installation Involves
TPO (thermoplastic polyolefin) is a single-ply membrane sold in rolls. According to HomeGuide, the rolls are 100 feet long and 6 to 12 feet wide, so even a small roof has several seams that must be joined in the field.
Most TPO sheets carry a reinforcement layer. IBHS notes that most thermoplastic membranes include a scrim, usually polyester or fiberglass, for strength and dimensional stability. IBHS notes that thermoplastic membranes are identified by seams formed with heat or chemical welding, and on TPO roofs the laps are fused with hot air.
The membrane is only the top layer. Under it sits an assembly of deck, insulation, often a cover board, and fasteners or adhesive. Each layer is listed in the manufacturer's specification, and the warranty assumes all of them were installed as written.
Where TPO Fits
HomeGuide is blunt about the limits: TPO is only suitable for flat or low-sloped roofs. You will see it on warehouses, offices, schools and retail buildings, and on the flat sections of homes, garages and additions.
The building code sets a floor for slope. The International Building Code requires thermoplastic single-ply roofs to have a design slope of at least one-quarter unit vertical in 12 units horizontal, which works out to a 2 percent slope, so water drains instead of sitting on the sheet.
Residential TPO Roofing on a House
On a house, the sequence is the same as on a commercial building, only smaller. HomeGuide's figures for a house run $7,700 to $14,000 installed, and $1,100 to $5,000 for a garage roof.
Homes raise a few specific questions. A flat roof over a living space often meets a wall of siding or stucco, so the wall flashing and counterflashing need extra care. If you plan to turn the roof into a deck, ask the membrane manufacturer which deck supports and pavers it approves before anything is placed on the sheet.
Ask the installer which manufacturer's system they will use, and confirm in writing that the manufacturer will issue its warranty on a residential job before you sign.
Step 1: Inspection and Tear-Off
A sound TPO job starts before any membrane arrives. The installer walks the roof, opens test cuts where needed, and maps soft spots, wet insulation, rusted metal deck and failed flashings.
This survey decides the biggest cost question on the project: whether the old roof can stay as a base or must come off down to the deck.
Checking for Trapped Moisture
Wet insulation under a new membrane keeps soaking the deck, loses its insulating value and can loosen fasteners and adhesive. That is why moisture findings carry weight in the bid.
Building Enclosure reports that some local or state codes have added language saying that if more than 25 percent of a roof area has moisture present, the entire roof area requires replacement. Ask whether your jurisdiction has that rule, and ask for the moisture findings on a roof plan.
What the Code Says About Roofing Over an Old Roof
The model codes allow a recover in limited cases. They bar it where the existing roof is water soaked or so deteriorated that it is not an adequate base for more roofing.
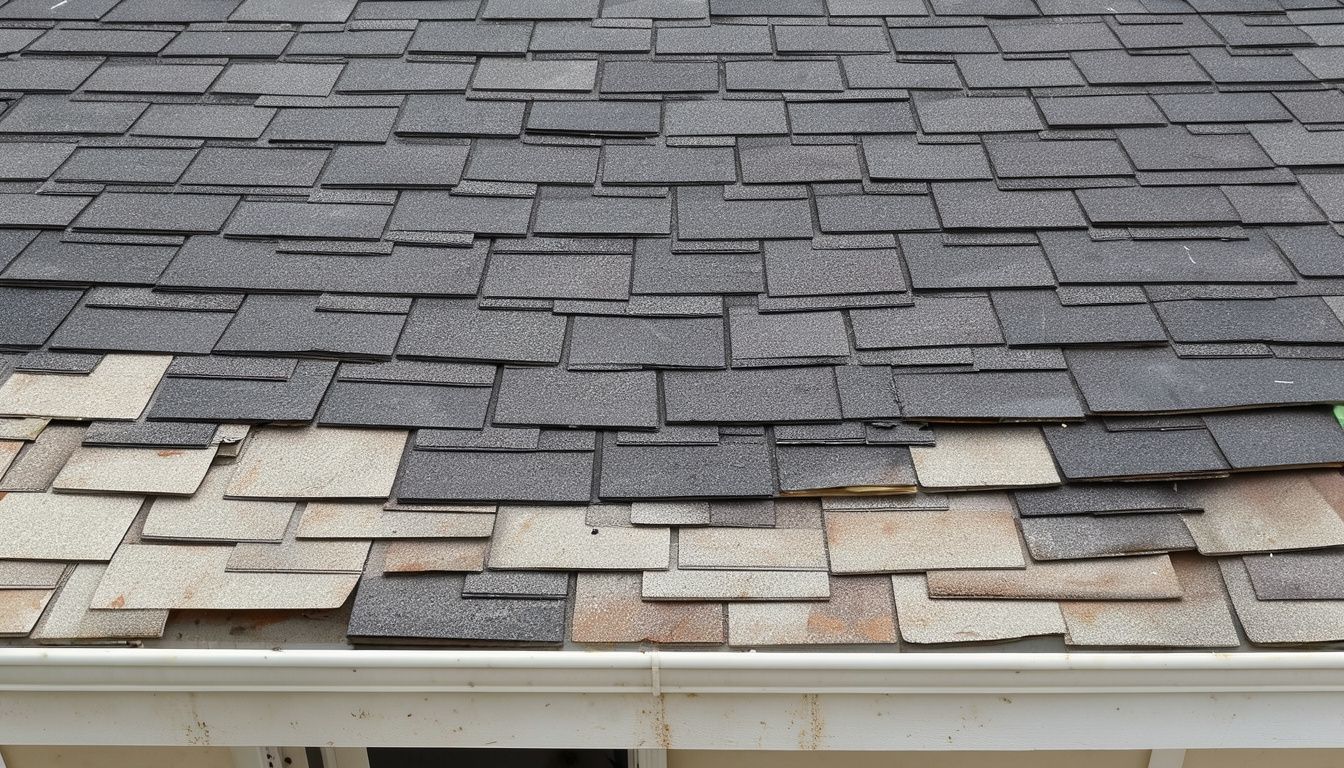
The code also bars a recover when the existing roof already has two or more applications of any type of roof covering. In that case the work becomes a full replacement, which the code defines as removing all existing layers down to the roof deck.
A recover can still be legal and sensible when the existing roof is dry, single-layer and approved by the TPO manufacturer.
Tear-Off and Disposal
Removal is labor-heavy and generates a lot of debris. HomeGuide says old roof removal adds $1 to $2 per square foot, and Fixr gives the same $1 to $2 range for tear-off, disposal and surface preparation.
On a working building, ask how the crew will protect the interior if rain arrives before the new roof is closed in. Good crews remove only what they can cover with a watertight assembly the same shift.
Step 2: Deck Preparation
The deck is the structural base for everything above it. IBHS notes that metal is the most common deck under single-ply roofs, but wood and concrete decks are common on smaller buildings and houses.
The deck type matters because it decides the fasteners. IKO points out that steel, concrete, wood and lightweight gypsum decks all require different fastener types, and the manufacturer's tables list approved fasteners and pull-out values for each.
Repairing and Cleaning the Deck
Rusted metal panels, rotted plywood and cracked concrete are repaired or replaced before insulation goes down. The surface is swept clean and must be dry, because adhesive will not bond to wet or dusty material and trapped water causes trouble later.
Deck repairs are usually priced per sheet or per square foot as an allowance. Make sure your contract states the unit price, so a surprise during tear-off does not become an open-ended change order.
Planning Slope and Drainage
Since the code calls for a quarter inch of slope per foot, the installer has to confirm the deck actually drains. If the structure is dead flat or sags, slope is built with tapered insulation in the next step.
Building Enclosure states that proper roofing procedures require ponding water to drain off the roof surface within 48 to 72 hours after a rainfall. Water that lingers longer is a design problem to fix before the membrane goes on, not after.
Step 3: Insulation and Cover Board
Insulation goes directly on the deck or on a vapor retarder when the design calls for one. It does three jobs: it holds heat in or out, it creates slope where needed, and it gives the membrane a smooth, firm surface.
Polyiso Under TPO
Polyisocyanurate, or polyiso, is the usual insulation under TPO. HomeGuide notes that TPO roofs typically use 4 by 8 foot polyiso boards.
Polyiso packs a lot of insulation into each inch. IKO's published chart for its foil-faced polyiso shows R-6.2 at one inch and R-12.4 at two inches, measured under ASTM C1289 conditions. Your local energy code sets the required total, and that requirement often drives the number of layers.
When two or more layers are used, the joints of each layer are offset from the layer below. This keeps gaps from lining up into a straight path for heat and air.
Tapered Insulation and Crickets
Tapered boards are cut in a factory to a slope, so they can push water toward drains and scuppers even on a flat deck. Crickets, which are small sloped sections, divert water around curbs and between drains.
There is a limit on how thin the taper can get. IIBEC cites the International Energy Conservation Code requirement that above-deck insulation at its thinnest point, including a roof drain or scupper, be no less than 1 inch thick.
Cover Boards and Hail Protection
A cover board is a thin, dense panel laid over the insulation. Johns Manville says adding one enhances the long-term performance of a commercial roofing system, and it lists high-density polyiso, low-density polyiso, cement and gypsum boards.
High-density polyiso adds a bit of insulation. JM rates its HD polyiso cover board at R-2.5. Gypsum and cement boards are chosen more for fire and impact resistance. JM notes that its cement roof board meets FM Class 1 fire barrier requirements.
In hail country, the cover board choice can decide what hail coverage the manufacturer will write. JM defines Very Severe Hail as hailstones two inches or wider in diameter, and says one of its gypsum boards achieves FM's VSH approval in select JM TPO systems.
How the Insulation Is Attached
Insulation is either screwed to the deck with plates or bonded with low-rise foam adhesive. The manufacturer's specification sets the pattern, which is tighter at corners and edges where wind uplift is highest.
Adhesive is not only a preference. IIBEC notes that manufacturers generally prohibit insulation fastening plates where a hail coverage warranty is specified, because metal plates create a hard pinch point for the membrane at hail impact points.
Choosing Membrane Thickness: 45, 60 or 80 Mil
Thickness is quoted in mils. HomeGuide notes that 45 mil and 60 mil are the most common thicknesses, while 80 mil is the heavy option tied to the longest warranties.
| Thickness | Typical use | Warranty example (Holcim Elevate InvisiWeld-S) | Installed price (Fixr) |
|---|---|---|---|
| 45 mil | Budget jobs, lighter-duty roofs, shorter planned service life | Up to 15 years | $3.00 to $4.50 per sq ft |
| 60 mil | The common middle choice on commercial and residential roofs | Up to 20 years | $4.00 to $6.50 per sq ft |
| 80 mil | Long-term owners, foot traffic, roofs where a 25 or 30 year system warranty is the goal | 20 years, or 25 or 30 years (80 mil only) | $5.50 to $8.50 per sq ft |
Carlisle describes its 80 mil Sure-Weld EXTRA sheet as built for the longest-term performance and weatherability.
How Thickness Ties to the Warranty
Manufacturers link the length of a system warranty to the sheet thickness. In Holcim Elevate's InvisiWeld-S bulletin, 45 mil TPO qualifies for up to 15 years, 60 and 80 mil for 20 years, and only 80 mil for 25 or 30 years.
If a bid lists a long warranty term, check that the thickness on the bid matches. Under Holcim's matrix, a 20-year term on a 45 mil sheet would not qualify, so question any bid that pairs them.
Step 4: Attaching the Membrane
There are four main ways to hold TPO down. The choice depends on the deck, wind exposure, building height, budget and what the structure can carry. HomeGuide and HomeAdvisor both put ballasted systems at the bottom of the price range and adhered systems at the top.
| Method | What it involves | Where it is used | Membrane system cost (HomeAdvisor) |
|---|---|---|---|
| Mechanically attached | Plates and screws through the membrane into the deck, placed in the seam laps and covered by the next sheet | Steel decks and moderate wind areas; Versico calls it a fit for moderate winds | $2 to $3 per sq ft |
| Fully adhered | Bonding adhesive over the whole sheet, or a fleece-back sheet set in foam adhesive | High wind zones, occupied buildings that want a tight surface, roofs with many penetrations | $2.75 to $3.50 per sq ft |
| Induction welded (RhinoBond, InvisiWeld) | Coated plates hold the insulation, then the membrane is fused to the plates from above with an induction tool | Metal retrofits and roofs that need uplift resistance without adhesive odors | Ask for a line item; priced like fastened systems plus tooling |
| Ballasted | Loose-laid membrane held down by stone or pavers | Large retail stores and warehouses with structure strong enough for the weight | $1.50 to $2.50 per sq ft |
Mechanically Attached Systems
Versico describes mechanically attached roofs as held by plates and fasteners secured through the membrane and into the deck. Carlisle adds that the fasteners and plates sit in the seams, so each row is covered and sealed by the next welded sheet.
The method has real advantages. Carlisle notes it has few installation temperature restrictions, and IKO points out that inspectors can verify fasteners on the roof, which they cannot do with adhesive.
There are trade-offs. Carlisle explains that sheet width is set by fastener spacing, and narrow sheets are usually required around the perimeter to resist uplift, which means more seams. Because the sheet is held only at the laps, it can flutter in the wind and create noise below the deck on very windy days.
The fastener pattern is not a crew decision. IKO stresses that the manufacturer strictly dictates the pattern, and the warranty depends on following it.
Fully Adhered Systems
In a fully adhered roof the whole sheet is glued to the cover board or insulation. Carlisle explains that the adhesive spreads uplift pressure evenly across the sheet instead of concentrating it at fastening points, which is why adhered systems tend to post higher wind uplift results.
Weather sets the schedule. IKO notes that it must be warm enough for the adhesive to bond, and each section has to be glued at one time to avoid air pockets. Carlisle says many older bonding adhesives could not be used below 40°F and rising, while newer adhesives allow work as low as 25°F.
Odor is another factor on occupied buildings. Carlisle acknowledges that fumes from solvent adhesives can be a problem, and some manufacturers offer low-VOC adhesives for that reason.
Induction Welded Systems (RhinoBond and InvisiWeld)
Induction welding is a hybrid. Sika describes the RhinoBond system as fusing the membrane directly to specially coated plates that already hold the insulation or cover board, so no fastener pierces the new membrane.
The process is quick but strict. Sika says the tool is held over each plate for a cycle of a few seconds, then a weighted magnet sits on the plate for a minimum of 60 seconds to set the bond.
Because plates are spread in a grid instead of rows, the uplift load is distributed over a larger area. Sika estimates that for a 1-90 rating, the grid uses 10 fewer fasteners and plates per square than a typical in-seam system using a 10-foot sheet fastened 12 inches on center.
Holcim Elevate's version, InvisiWeld-S, uses a coated 3-inch round plate that attaches both insulation and membrane, and a hand-held inductor can weld at parapets and curbs. Versico lists no odors or VOCs and little noise for occupants as benefits of the method.
Ballasted Systems
Versico describes ballasted roofs as a loose-laid membrane held in place by stone or pavers, popular on large retail stores and warehouses. Carlisle notes that TPO is one of the membranes commonly used under ballast.
The stone is heavy by design. Carlisle says ballast weight runs from 10 pounds per square foot, the code minimum, to 25 pounds or more, using stones at least an inch in diameter. IIBEC adds that manufacturers require river-bottom rounded stone.
Ballasted roofs fall under a national standard. IIBEC states that ballasted roofs in areas served by the IBC and the International Residential Code must conform to ANSI/SPRI RP-4, which provides design data only up to a building height of 150 feet.
The first question is structural. IIBEC lists it plainly: the roof structure must be able to support the weight of a ballasted system. That rules ballast out for most houses and many older light-framed buildings.
Self-Adhered and Fleece-Back Variations
Some systems skip liquid adhesive. Johns Manville says its self-adhered TPO can be installed up to three times faster than a traditional fully adhered application, using a factory-applied adhesive.
Fleece-back TPO has a polyester fleece laminated to the underside. JM pairs it with foam adhesives that bond the sheet to the insulation, which helps over rough substrates and in recover work.
Step 5: Laying Out and Welding the Seams
Seams are where TPO succeeds or fails. The roof can have hundreds of feet of laps, and each inch must be fused, cooled and checked.
Sheet Layout
The crew unrolls the sheets, lets them relax, and overlaps each one onto the last. Laps run so water flows over them rather than into them where possible.
Before welding, contaminated or weathered membrane must be cleaned. Johns Manville sells membrane cleaners specifically to remove dirt and asphalt so the weld or bond takes, and a separate cleaner for weathered sheet.
Hot-Air Welding Equipment
Long field seams are welded with an automatic hot-air machine that travels along the lap at a set temperature and speed. Hand welders and silicone rollers handle corners, flashings and short runs.
Settings drift as air temperature and wind change during the day. That is why the manufacturers require test welds and probing throughout the day instead of trusting the machine dial.
Test Welds Each Morning and Afternoon
Carlisle recommends, at a minimum, a test weld before work begins each morning and each afternoon. The sample is cooled for about 10 minutes, then peeled apart to check for a consistent weld at least 1.5 inches wide.
A good test sample tears in a particular way. Carlisle notes that delamination of the membrane from the scrim reinforcement indicates a properly welded seam, meaning the weld is stronger than the sheet layers.
Probing Every Seam
Once welds cool, every lap is probed. Carlisle says seams should cool for at least 30 minutes before probing, while Versico gives a minimum of 20 minutes, so follow the guide for your brand.
The tool is simple. Versico calls a blunt cotter pin puller an acceptable probe. The tip is drawn along the seam edge with firm pressure into the seam junction, but not into the bottom sheet.
Both Carlisle and Versico say particular attention must go to membrane intersections and to seams over insulation joints. Versico requires repairs no later than the end of each workday, and cut edge sealant only after all probing is done.
What a Good Weld Looks Like
Versico and Carlisle both set a minimum weld width of 1.5 inches for TPO. Versico requires welds narrower than that to be overlaid even if they pass the probe.
There is a visual clue too. Versico says a properly heated field weld usually shows a sheen about 1/2 inch wide on the bottom sheet at the overlap. Scorched or discolored areas are a sign of overheating, and Versico calls for an overlay repair when the membrane was damaged, even if the weld probes well.
T-joints, where three sheets meet, get extra treatment. Johns Manville sells T-joint patches to cover these spots, along with exposed discs and fasteners.
Step 6: Flashing Walls and Parapets
Flashings carry most of the leak risk. Building Enclosure reports that approximately 75 percent of all roof leaks are reported at flashings and penetrations, and Roofing Contractor calls the flashing the most vulnerable part of any roof system.
Base Flashing Height
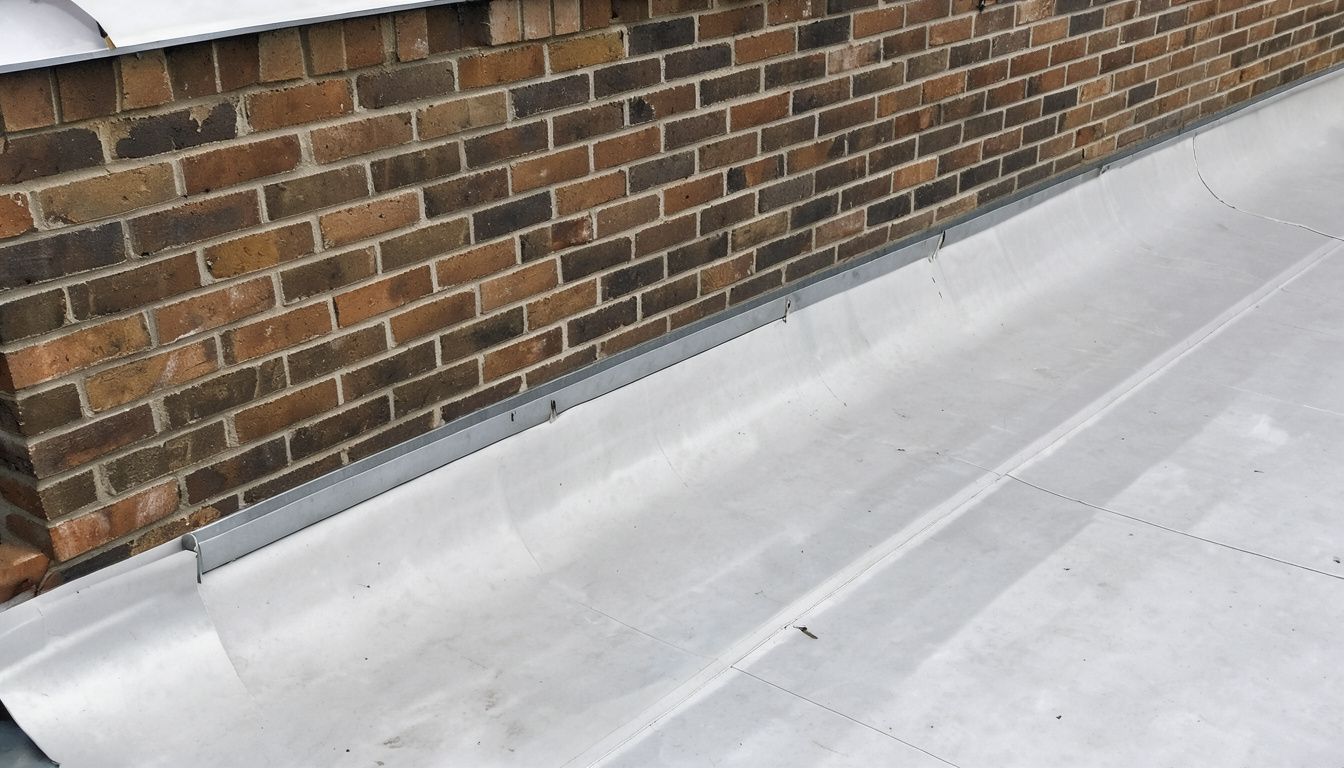
Wall flashing climbs up from the field membrane and is adhered to the wall or parapet. Roofing Contractor states that vertical flashings must be a minimum of 8 inches above the completed roof surface, which keeps water from pouring over the top.
There is also a ceiling. Roofing Contractor notes that most manufacturers publish maximum flashing heights, because reinforced sheet is heavy on tall walls. Building Enclosure adds that a termination bar is required for flashing over 24 inches, and straps are recommended above 36 inches.
The flashing must be bonded. Building Enclosure says flashing material should always be fully adhered to the substrate, even on loose-laid and mechanically attached roofs.
Terminations and Counterflashing
The top edge of the flashing is clamped with a termination bar or covered by metal counterflashing. Roofing Contractor gives a fastener rate of one every 6 to 8 inches for terminations.
The American Society of Home Inspectors explains that counterflashing protects the top of the base flashing, and that TPO, unlike modified bitumen, does not require a cant strip at the wall.
On homes, the wall is often siding or stucco. The counterflashing has to tuck behind the wall cladding or into a reglet, not just be caulked to the face, so water running down the wall stays outside the flashing.
Step 7: Curbs, Pipes and Other Penetrations
Every opening in the membrane is a planned weak point. IIBEC notes that any penetration through a low-slope roof is a potential failure point over the roof's life, so each one gets a specific detail.
Curbs for HVAC Units, Hatches and Skylights
Rooftop units, hatches and skylights sit on curbs. Building Enclosure recommends curb height of at least 8 inches above the completed roof, with separate flashing that extends from the top of the curb at least 4 inches out onto the roof.
Corners are the hard part. Manufacturers sell pre-molded inside and outside corners, and field-formed corners use unreinforced detail membrane that can stretch around the shape.
Pipes, Vents and Irregular Penetrations
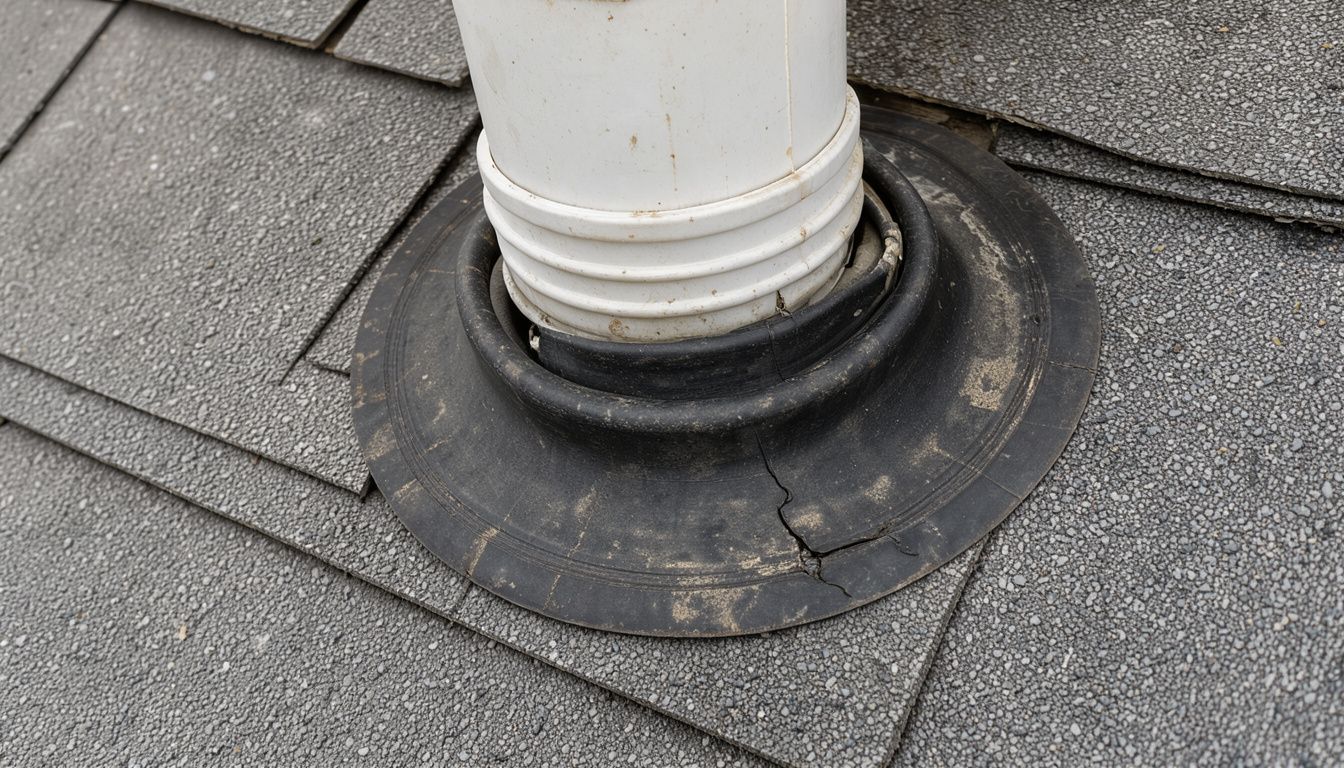
Round pipes get boots. Johns Manville makes flexible TPO pipe boots for vent stacks and round penetrations, plus prefabricated split boots that can wrap a pipe without disconnecting it.
Clusters of conduit or odd shapes get a penetration pocket. JM describes a molded two-piece unit with a rounded base flange, filled with pourable sealer. Pockets need periodic topping up, so note their locations on your maintenance plan.
Step 8: Drains, Scuppers and Gutters
Drains move all the water off an internally drained roof, so their detailing deserves a close look. A clogged drain is not only a leak risk: IIBEC warns that backups can overload the roof structure during heavy rain.
Drain Sumps
Around each drain the insulation is tapered down to form a sump. IIBEC recommends a four-sided, gradual slope rather than a steep bowl, and warns against bare polyiso faces in the sump, where there is no facer for the flashing to adhere to.
Clamping Rings and Seams Near Drains
The membrane is set in butyl mastic over the drain flange and clamped by the drain ring. IIBEC says every bolt hole in the clamping ring must receive a bolt, damaged rings must be replaced, and the membrane must extend at least 1/2 inch past the bolts toward the center.
A quick field check comes from the same source: if a washer spins, the bolt is not tight. Field seams are generally kept 12 inches or more from the clamping ring, because tightening the ring can wrinkle nearby seams. When a seam lands too close, a target patch of new membrane is welded in.
Overflow Drains and Scuppers
Overflow drains are a backup. IIBEC explains that they sit slightly above the roof plane as local rainfall data and codes require, so they only take water when the primary drain clogs.
Scuppers at the roof edge are often made of TPO-coated metal. IIBEC notes that coated metal lets the flashing be hot-air welded directly to the scupper, which simplifies the detail.
Step 9: Edge Metal and Perimeter Securement
The roof edge is where wind attacks first. Carlisle cites Factory Mutual as attributing 80% or more of roof failures directly to failure of the roof edge.
The ANSI/SPRI ES-1 Standard
Edge metal for low-slope roofs is tested under ANSI/SPRI ES-1, which Carlisle notes was adopted into the International Building Code. The standard uses three pull-off tests, two for fascia and one for coping, based on ASCE 7 wind loads.
In one fascia test, the membrane is pulled at a 45-degree angle to the deck to mimic a billowing sheet. Carlisle's advice to designers is to specify ES-1 compliant pre-manufactured edge, or edge made by an ES-1 compliant shop.
Wood Blocking and Fascia
Edge metal is screwed into wood blocking at the perimeter. IIBEC says the blocking must be secured per the manufacturer, local code, FM Global and SMACNA requirements, and must be wide enough to support the full flange of the edge metal or gutter.
Johns Manville sells TPO-coated metal that is formed into edge details, so the membrane can be welded to the metal rather than relying on sealant alone. Ask the installer whether the edge they plan is coated metal, a listed pre-manufactured system, or shop-made.
Walkways and Finishing Details
Service technicians wear paths across a roof. Johns Manville offers textured TPO walkpads as walkway material and protection around high-traffic areas, which are welded to the field sheet.
Walkpads belong on the routes between the roof hatch and rooftop units. They are cheap insurance against dropped tools and heavy boots on the most-walked parts of the roof.
The last finishing step is cleanup: loose screws, drill shavings and membrane offcuts are removed, drains are cleared, and the roof is walked again for punctures.
Step 10: Final Inspection and Manufacturer Warranty
When the roof is finished, two inspections can happen. The contractor checks its own work, and if a system warranty was purchased, the manufacturer's representative inspects before issuing it.
What the Manufacturer Inspects
Johns Manville says its field technical staff monitors roofing applications during installation and makes a final inspection on each roof covered by its Peak Advantage program upon completion.
Inspectors typically probe seams, look at flashings, terminations and drains, and compare details with the approved drawings. Items they flag must be fixed before the warranty is issued, so ask the contractor for the punch list and a copy of the final warranty.
Warranty Terms by Manufacturer
Holcim Elevate says its Red Shield warranty includes material and labor coverage with no-dollar-limit liability, edge-to-edge system coverage including membrane, insulation and metal, and transfer from owner to owner. Terms range from five years to a Platinum 30-year warranty, depending on the system.
Carlisle ties its longest-term performance to the 80 mil Sure-Weld EXTRA sheet. Johns Manville, Versico and GAF each publish their own TPO warranty documents, so ask for the actual sample warranty for the system on your bid.
Read the exclusions before you sign, especially the owner's maintenance duties and the rules for adding equipment or cutting into the roof later.
Wind Speed and Hail Coverage
Wind and hail coverage are usually optional add-ons. IBHS cautions that the warranted wind speed can vary and may or may not match the basic wind speed set for your location.
FM Approvals maintains RoofNav, which IBHS calls the most commonly referenced database of uplift test results for single-ply systems. If your site has high wind exposure, ask the designer which tested assembly the attachment pattern is based on.
How Much TPO Roofing Installation Costs
National cost guides land in a similar band, but they are averages, not quotes. HomeGuide puts the installed price at $4 to $10 per square foot, with a national average of $11,200 and a typical range of $7,700 to $14,000.
HomeAdvisor gives $4.50 to $16 per square foot, a normal range of $6,500 to $24,000, and an average of $10,700. Fixr uses the same $4.50 to $16 per square foot range for installed systems.
You can run your own size and region through the roof cost calculator to see how these ranges apply to your building.
| Roof size | HomeGuide range | HomeAdvisor range |
|---|---|---|
| 500 sq ft | $2,000 to $5,000 | $2,500 to $8,500 |
| 1,000 sq ft | $4,000 to $10,000 | Not listed |
| 1,500 sq ft | $6,000 to $15,000 | $6,750 to $24,000 |
| 2,000 sq ft | $8,000 to $20,000 | $9,000 to $34,000 |
| 3,000 sq ft | $12,000 to $30,000 | $14,000 to $40,000 or more |
Cost Breakdown per Square Foot
HomeGuide splits the job into parts: membrane material at $1.00 to $2.50 per square foot, insulation at $0.50 to $3.00, labor at $2.50 to $4.50, and removal of the old roof at $1 to $2. Its total for a full install with tear-off comes to $5.00 to $12.00 per square foot.
Labor is the largest share. HomeAdvisor says roofers charge $3 to $7 per square foot, or $75 to $120 per hour in some markets, and that labor can reach as much as 70% of the budget.
Cost by Attachment Method
HomeAdvisor prices membrane systems at $1.50 to $2.50 per square foot for ballasted, $2 to $3 for fastened, and $2.75 to $3.50 for adhered. HomeGuide's material-only table puts 45 mil ballasted at $1.80 to $2.30, fastened at $2.00 to $3.00, and adhered at $2.80 to $3.20.
These are system numbers, not totals. Insulation, tear-off, flashing and labor are added on top.
Cost by Thickness
Fixr puts installed 45 mil TPO at $3.00 to $4.50 per square foot, 60 mil at $4.00 to $6.50, and 80 mil at $5.50 to $8.50. The step from 60 to 80 mil is often what qualifies a roof for the longest warranty tiers, so compare the price gap against the extra warranty years.
Insulation Costs
HomeGuide lists polyiso at $0.50 to $1.50 per square foot for 1 inch, $1.00 to $2.50 for 2 inches, and $1.30 to $3.00 for 3 inches. HomeAdvisor gives $1.60 to $2.40 per square foot for polyiso and $1.60 to $4.20 as its overall insulation range.
HomeGuide notes that polyiso sometimes costs more than the TPO material itself, so a quote that seems high may simply carry more R-value or a tapered package. Ask for insulation thickness and type as separate lines.
Extras That Raise the Bid
Details add up fast. HomeGuide says flashing costs $50 to $500 depending on the number and complexity of penetrations, and that chimneys, drains, curbs and skylights add $200 to $500 to the final price.
Fixr notes that larger, simpler roofs usually cost less per square foot because of economies of scale. A small roof with three units, a skylight and two drains will price well above the per-square-foot averages.
How to Read a TPO Quote
A clear quote names the manufacturer and product, the thickness, the attachment method, the insulation type and thickness, and the cover board. It should also state whether tear-off is included and how many layers are being removed.
Look for unit prices on deck replacement and wet insulation, the type of edge metal, the number of drains and penetrations being flashed, and the warranty name and term. HomeGuide recommends getting three or more quotes, and HomeAdvisor says to get at least three before signing.
Weather and Scheduling on Installation Days
TPO goes down in dry weather. Mechanically attached systems tolerate cold better than adhered systems, because, as Carlisle notes, mechanical attachment has few installation temperature restrictions.
For adhered roofs, check the adhesive's temperature limits against your season. Carlisle notes that older bonding adhesives stopped at 40°F and rising, while newer products reach 25°F.
Wind and air temperature also change how the welder performs. Crews that probe and test-weld through the day catch these shifts before they become long runs of weak seam.
Maintenance After Installation
A TPO roof needs little care, but it does need regular attention. Most warranty problems begin with debris, clogged drains and damage from other trades on the roof.
Twice-a-Year Inspections
NRCA recommends that homeowners and building managers inspect their roofs at least twice per year, preferably in the spring and fall, with extra checks after hurricanes, tornadoes or hailstorms.
Holcim Elevate recommends that at least one assessment per year be done by the licensed applicator that installed the roof. Inspectors look for tears, splits, punctures and clogged drains and gutters.
What You Can Check Yourself
From a safe vantage point, look for standing water a few days after rain, debris piled at drains, open seams at corners, and sealant that has cracked at pockets and terminations.
NRCA advises removing leaves and other debris during each maintenance visit. Holcim Elevate adds pruning overhanging trees and having your mechanical contractor check rooftop equipment, since leaking units and loose panels damage the membrane.
Repairs and What They Cost
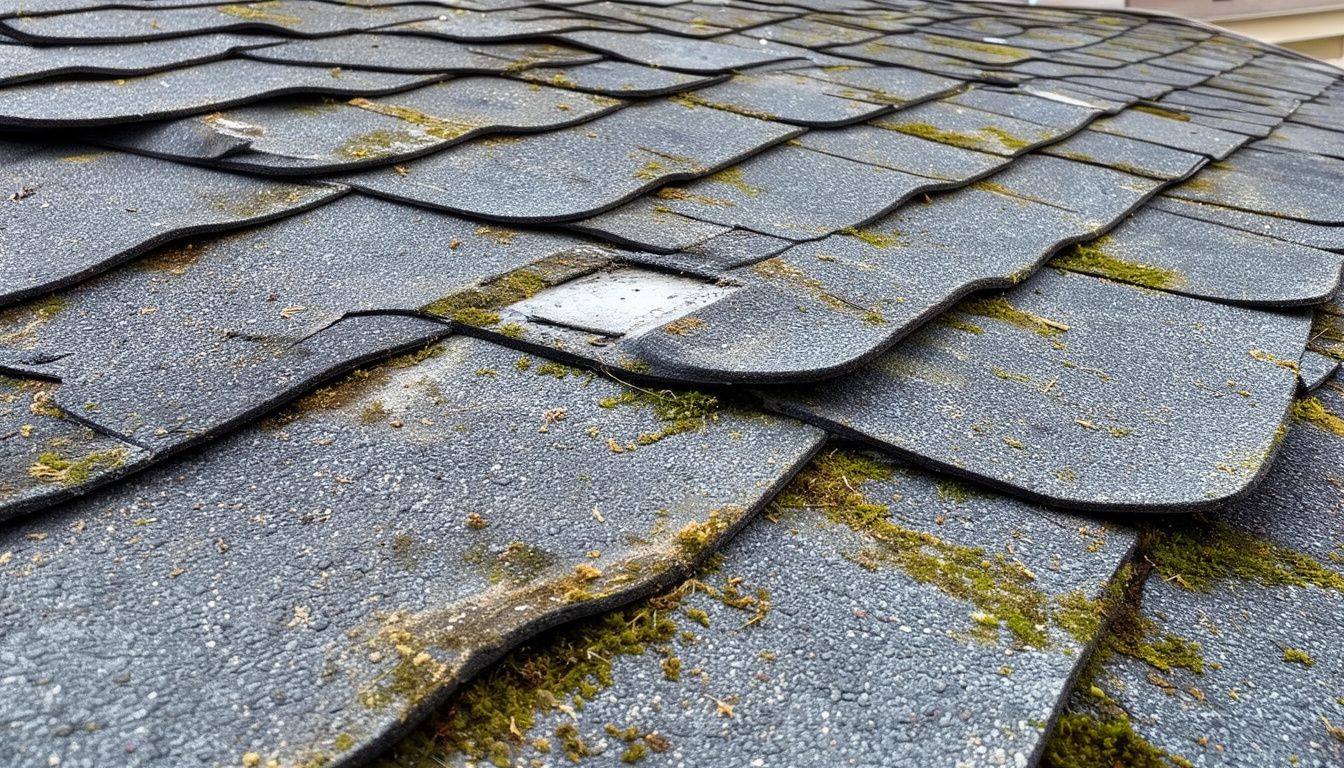
Because TPO is thermoplastic, a clean, prepared sheet can be patched by welding new membrane over the damage. Weathered membrane must be cleaned with the right product first, or the patch will not fuse.
HomeGuide puts TPO flashing repair at $200 to $500 on average. Report leaks promptly under the warranty, and do not let an unapproved contractor cut into the roof, since that can affect coverage.
How Long a TPO Roof Lasts
Estimates vary by source. HomeGuide says TPO roofs last 10 to 25 years, depending on material quality and thickness. This Old House gives 15 to 30 years with proper care and routine maintenance.
Thickness, installation quality and maintenance explain most of that spread. A roof with clean seams, sound flashings and clear drains sits at the top of the range.
Mistakes to Look for During and After Installation
You do not need to be a roofer to spot many of the common errors. Walk the roof with the contractor at the end of each phase, or hire an independent consultant on larger jobs.
Seams That Were Never Probed
Ask to see the probe and the day's test weld samples. A crew that cannot show either may not be checking seams at all, and both Carlisle and Versico require probing of every heat-welded lap.
Narrow or Scorched Welds
Look at the weld edge. Welds narrower than 1.5 inches, burned spots and wrinkles at the lap are all reasons for an overlay repair under Versico's rules.
A Fastener Pattern That Does Not Match the Spec
Perimeter and corner zones need more fasteners or narrower sheets. If rows look evenly spaced across the whole roof, ask for the attachment drawing.
Seams Too Close to Drains
Field seams running through a drain sump or close to the clamping ring are a known leak source. IIBEC calls for target patches so that seam edges stay at least 12 inches from the ring.
Low or Loose Wall Flashing
Measure the base flashing at walls and curbs. Less than 8 inches above the finished roof, or flashing that hangs loose instead of being adhered, invites leaks during wind-driven rain.
Wet Insulation Left in Place
If test cuts found wet insulation, the bid should show it being removed. Covering it with a new membrane locks the water in.
Edge Metal Without a Listing
Ask whether the edge is ES-1 compliant. Carlisle's guidance is to use listed pre-manufactured edge or edge from an ES-1 compliant shop, so ask for the listing or the shop's credentials.
Mixed or Unapproved Components
A system warranty covers the manufacturer's listed components. Substituted adhesives, fasteners or cover boards can void it, so check the delivery labels against the specification.
Pitch Pockets Without Maintenance
Penetration pockets are filled with pourable sealer. If your roof has them, add them to the twice-a-year checklist and have them topped up when the sealer pulls away from the pipe.
Questions to Ask a TPO Installer
A few direct questions separate experienced installers from crews who learned on your roof.
- Which manufacturer's system are you installing, and are you an approved applicator for its warranty?
- What thickness, attachment method, insulation and cover board are in the bid?
- How many layers are coming off, and how will wet insulation and deck damage be priced?
- Who performs test welds and probing, and how often?
- Is the edge metal ES-1 compliant?
- Who handles the permit and the manufacturer's final inspection?
- What is the warranty name and term, and does it cover labor as well as material?
Installer Certification
NRCA runs a PROCertification for thermoplastic systems installers. To qualify, an installer needs at least 24 months of experience with thermoplastic roofs, including pipe penetration and curb flashing details, sheet layout and attachment, and must pass a hands-on skills assessment.
Manufacturer approval matters just as much, because only approved applicators can offer the longer system warranties. Ask for both, and check them before you sign.
Why DIY Rarely Makes Sense
A TPO roof depends on heat-welded seams, special tools and manufacturer details, and a system warranty requires an approved applicator. Small garage or shed roofs are the only place a skilled owner might consider it.
Even then, welding equipment, probing and flashing details take practice. The savings on labor rarely cover the cost of one hidden leak.
To see where the price ranges on this site come from, read how we calculate our cost ranges.
Frequently asked questions
How much does TPO roofing installation cost per square foot?
HomeGuide puts installed TPO at $4 to $10 per square foot, while HomeAdvisor and Fixr give $4.50 to $16. HomeGuide's breakdown shows labor at $2.50 to $4.50 and old roof removal at $1 to $2 per square foot. Thickness, insulation and the number of penetrations move a project within those ranges.
Is 45, 60 or 80 mil TPO the right choice?
HomeGuide notes that 45 and 60 mil are the most common thicknesses. Manufacturers tie warranty length to thickness: in Holcim Elevate's InvisiWeld-S program, 45 mil qualifies for up to 15 years, 60 mil for 20 years, and only 80 mil for 25 or 30 years. Pick the thickness that matches the warranty term you want and how long you plan to own the building.
How are TPO seams checked?
Seams are hot-air welded, allowed to cool, then probed with a blunt tool along the edge. Carlisle recommends test welds each morning and afternoon and a minimum weld width of 1.5 inches, and Versico requires narrower welds to be overlaid. Any void found by the probe is marked and rewelded before the crew leaves.
Can TPO be installed over an existing roof?
Sometimes. The model codes bar a recover when the existing roof is water soaked or deteriorated, or when it already has two or more layers of roof covering. A moisture survey of the existing roof should come first, since wet or deteriorated material rules out a recover.
Which TPO attachment method is the most wind resistant?
Carlisle explains that fully adhered systems spread uplift evenly across the sheet, which is why they tend to post higher wind uplift results than mechanically attached roofs. Induction welded systems such as RhinoBond also spread the load through a grid of plates. The right choice depends on the tested assembly for your deck and wind exposure.
How long does a TPO roof last?
HomeGuide gives 10 to 25 years, while This Old House gives 15 to 30 years. Seam quality, flashing details, thickness and maintenance explain most of the difference. NRCA recommends inspecting the roof at least twice a year, in spring and fall.
Sources
- HomeGuide, homeguide.com/costs/tpo-roofing-cost (read November 22, 2026)
- HomeAdvisor, homeadvisor.com/cost/roofing/tpo-roof (read November 22, 2026)
- Fixr, fixr.com/articles/tpo-roof-cost-installation-variables-and-project-prices (read November 22, 2026)
- This Old House, thisoldhouse.com/roofing/tpo-roofing-material (read November 22, 2026)
- Versico, versico.com/en/Resources/Media/Blog/2020/01/14/Seam-Probing (read November 22, 2026)
- Carlisle, carlislesyntec.com/Resources/Media/Blog-Landing-Page/TecTopics/2023/03/21/Focus-on-Test-Welds-and-Seam-Probing (read November 22, 2026)
- Carlisle, carlislesyntec.com/Roofing-Products/Membranes/TPO/Sure-Weld (read November 22, 2026)
- Carlisle, carlislesyntec.com/Resources/Media/Blog-Landing-Page/SpecTopics/2023/09/25/Mechanically-Attached-vs-Fully-Adhered-Roof-Systems (read November 22, 2026)
- Versico, versico.com/Education/Application-Methods/Mechanically-Attached (read November 22, 2026)
- Versico, versico.com/Education/Application-Methods/Induction-Welded (read November 22, 2026)
- Versico, versico.com/en/Education/Application-Methods/Ballasted (read November 22, 2026)
- IKO, iko.com/comm/blog/fully-adhered-vs-mechanically-attached-tpo/ (read November 22, 2026)
- Sika Sarnafil, usa.sika.com/sarnafil/en/products-systems/pvc-roofing-systems/rhinobond-system.html (read November 22, 2026)
- Holcim Elevate, holcimelevate.com/ca-en/bulletins/new-options-for-invisiweld-induction-welding-system (read November 22, 2026)
- Carlisle, carlislesyntec.com/en/Resources/Media/Blog-Landing-Page/SpecTopics/2020/01/09/Ballasted-Roofs-A-New-Look-at-an-Old-System (read November 22, 2026)
- IIBEC, iibec.org/publication-post/spri-ansi-standards-standardizing-roof-system-performance/ (read November 22, 2026)
- IIBEC, iibec.org/publication-post/a-new-look-at-ballasted-roof-performance/ (read November 22, 2026)
- IKO, iko.com/comm/blog/insulation-thickness-r-value-chart/ (read November 22, 2026)
- Johns Manville, jm.com/en/commercial-roofing/roofing-insulation-and-cover--boards/ (read November 22, 2026)
- IIBEC, iibec.org/publication-post/best-practices-for-the-design-and-installation-of-thermoplastic-roofing-systems (read November 22, 2026)
- Roofing Contractor, roofingcontractor.com/articles/86566-proper-flashing-methods-for-low-slope-roofs (read November 22, 2026)
- Building Enclosure, buildingenclosureonline.com/articles/82671-roofing-details-curbs (read November 22, 2026)
- Building Enclosure, buildingenclosureonline.com/articles/83807-roofing-details-perimeter-flashing (read November 22, 2026)
- American Society of Home Inspectors, homeinspector.org/?p=13323 (read November 22, 2026)
- Johns Manville, jm.com/content/jm/global/en/index/commercial-roofing/tpo-design-and-installation-considerations (read November 22, 2026)
- Carlisle, carlislesyntec.com/en/Resources/Media/Blog-Landing-Page/SpecTopics/2022/09/09/The-ES-1-Standard-and-Metal-Roof-Edges (read November 22, 2026)
- Building Enclosure, buildingenclosureonline.com/articles/83783-roofing-code--section-1507-13-thermoplastic-single-ply-roofing (read November 22, 2026)
- Building Enclosure, buildingenclosureonline.com/articles/84345-roofing-code-recovering-versus-replacement (read November 22, 2026)
- GoCodebook (California Building Code), gocodebook.com/us/california/california-building-code/roofing/insulation-reroofing-and-rooftop-structures/reroofing-recover-and-replacement (read November 22, 2026)
- IBHS, ibhs.org/guidance/ricowi-roof-guide-single-ply-membrane/ (read November 22, 2026)
- Johns Manville, jm.com/en/commercial-roofing/commercial-roofing-contractor-resources/rs-guarantee-technical-and-warranty-services (read November 22, 2026)
- Holcim Elevate, holcimelevate.com/us-en/resources/building-owners-toolbox (read November 22, 2026)
- Holcim Elevate, elevatecommercialbp.com/us-en/roof-topics/seasonal-commercial-roof-inspections (read November 22, 2026)
- NRCA (Professional Roofing), professionalroofing.net/articles/article/2338 (read November 22, 2026)
- NRCA, nrca.net/procertification/certifications/thermoplastic-systems-installer (read November 22, 2026)